Tuesday, January 16, 2018

BRUSHED MOTOR MAINTENANCE

                                   Beneficial Brushed Motor Maintenance


INTRODUCTION

Brushed motor mounted in RC Vehicle
The answer is no, it is not required but there are definitely some benefits for performing break-in and brushed motor maintenance.
Proper break-in and maintenance can improve performance and extend the life of the motor.
The break-in procedure basically seats the brushes to the commutator.
There are numerous opinions on how to properly  break-in a brushed motor, the most common being the wet method, in which the motor is placed into clean water, and ran for a period of time to seat the brushes, the water keeps the motor cool and actually flushes out any excess debris derived from the process.
As the motor is run, often in dirty or wet environments, good general maintenance practices can be utilized after running to maintain performance and longevity of the motor.
The purpose here is to give some good general  break-in and brushed motor maintenance practices to help users prolong the life of their brushed motors.

Breaking in a Brushed Motor
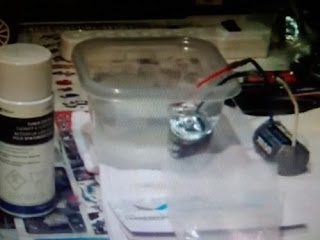
brushed motor maintenance
Breaking in Brushed Motor in Distilled Water

Note: These are the 2 most common methods used for break-in.
Wet Method - Never use this procedure on brushless motors
What you will need - Distilled Water or Rubbing Alcohol, Electronic Contact Cleaner,  Motor Bearing oil and 2  "D" size batteries with wire and alligator clips.
1)  First things first if your motor is mounted in your RC vehicle you will want to disconnect the wire leads and remove it from the motor mount, if you are replacing a motor go ahead and perform the break-in process before installing the motor.
Note: You may need to remove the pinion gear before you can remove the motor.
2) Pour some distilled water or rubbing alcohol into a cup( enough to submerge the motor). Next take a couple of D size batteries with wire and alligator clips, hook the wire leads up properly to motor for correct rotation, (you don't want to break the motor in reverse) D batteries are used to keep the motor speed down for proper break-in. The water acts as a lubricant, it keeps the motor cool and carries away the carbon particles as the brushes break-in.
3) Let the motor run 20 to 30 minutes.
4) Disconnect the battery leads from the motor, you will notice that the water is fairly dirty due to the carbon particles that have been carried away from the motor.
Applying Bearing Oil to Rotor Shaft Bushings
5) It is very important that you clean the motor and lube it after break-in. Take some electronic contact cleaner and spray it all over the inside of motor, (you don't want the motor to rust) until the liquid coming out is clear.
6) Apply a drop of bearing oil on the bushings or bearings of the motor shaft on the front and rear of the motor. Then apply a drop of oil on the inside of the motor on the commutator, and rotate the shaft by hand to distribute the oil.
7) Install the motor and set the gear mesh, many use the paper method for proper alignment.

Dry Method  
1) If your not comfortable with the wet break-in you can use the dry method. You will need to remove the motor and pinion gear (if required).
2) Get your battery and motor hooked back up as if it were in the RC vehicle.
3) You will now use the throttle trim on your transmitter to run the motor at an extremely slow speed, you don't want to run the motor at high speeds with a wet or dry break-in.
4) Let the motor run for 20 or 30 minutes.
5) Disconnect the motor.
6) Spray the whole inside of the motor with electronic contact cleaner until the liquid running out is clear.
7) As in the wet method, apply a drop of bearing oil on both ends of the motor on the bushing or bearing.
Apply 1 drop of oil on the commutator inside the motor, then rotate the shaft by hand to distribute the oil.
8) Install the motor and set the gear mesh according to specs.

GENERAL BRUSHED MOTOR MAINTENANCE


Traxxas Rustler RC Car in the Dirt
As drivers run and use their RC Models often in dirty, muddy, and wet environments a few periodic maintenance procedures can be utilized to maintain long term reliability and performance.
The type of conditions you run in will determine how often the motor will need to be cleaned.
If you have a motor with a sealed can, you will not be able to access the motor.
1) Remove the motor from the RC vehicle
2) Clean the exterior of the can with a soft bristle brush and cleaner, be sure to remove any dirt or debris around the bushing or bearings on both ends of the motor.
3) If you have access to compressed air you can blow the bulk of the dust and debris out of the motor with air, then clean the inside of the motor by spraying electronic contact cleaner into the various port holes until the liquid coming out is clear. Dry the motor off with towels.
4) Apply one drop of bearing oil on the bushings or bearings on each end of the motor, put a drop of oil on the commutator inside the motor. Spin the motor shaft a couple of times.
5) Install the motor and set the gear mesh to specs. (Paper method is common)

Final Thoughts
A brushed motor is not going to last forever, but with some preventative maintenance you give yourself a chance to get the maximum life out of your brushed motors.
Dirt, mud, dust, and debris will certainly shorten the life of the motor, some preventative maintenance can save you in the long run.


Thursday, January 4, 2018

HOW TO FLY A DRONE

                                                Learning to Fly a Drone


Drone Pilot Hovering his Drone


INTRODUCTION

Recently (the day after Christmas), I came across a few requests on social media from some in my local community who had apparently received a Drone as a Christmas gift, attempted to fly it and lost it.
They gave the location and brand name of the drone that had disappeared and asked those in the area to call if they happen to find it.
I felt bad for them, and realized they were trying to fly something they hadn't learned to control yet, when it got away from them, they probably lost orientation and subsequently lost their drone.
I began thinking back to my first flight with a drone and how I trained myself to fly and enhance my skills.
When it comes to flying a drone there are a series of steps you need to go through in order to learn to fly successfully, first of all it isn't going to happen over night.
In order to achieve drone flight successfully, you will need to do repetitive training with the various control features.
The purpose of this post is to give beginners a few tips that will hopefully help them learn to fly a drone without the heartache some have experienced.

Selecting a Drone 
First things first, if you are new to flying I recommend you take some time in choosing a drone that is suitable for a beginner, there are number of great choices on the market today.
I personally chose the Latrax Alias, number one it was affordable, it had an auto leveling six axis flight system, and 3 flight modes, Easy, Fast, and Expert.
Durable, with readily available replacement parts when warranted.
It was a great choice for me, I could learn to fly in easy mode and advance to fast and expert modes as my skill level increased without having to purchase another drone to advance.
It is a great sport flyer and will perform multiple flips, twists, and rolls for a more aerobatic flying experience.
I still enjoy flying it to this day.

TRAINING YOURSELF TO FLY

Location - when your learning how to fly a drone, you want to pick a location free of obstacles, like trees, buildings, roofs, swing sets etc.and more importantly places where a large number of people.tend to congregate (you wouldn't want to strike someone with the drone).
First Flight - Before attempting to fly make sure you know the control functions on the transmitter.
Taking off / Landing
how to fly a drone
Young Drone Pilot Flying his Drone

Find a level location to set the drone down on with the nose out, position yourself about 10' from the drone for safety purposes.
Remember use light inputs on the transmitter so you don't lift off like a rocket on a launch pad.
Lift the drone off the ground about 5 ' or so by pushing the throttle stick forward,  don't rotate the drone if at all possible, keep it pointed nose out,  then pull the throttle stick back, bring it back down and land it.
You may have to do this numerous times to get the feel of the throttle control.
As your skill level increases, you can keep extending your height until your confident that you can take off and land safely.
Hovering 
Holding a lightweight drone in a hover can be a challenge in windy conditions, but fairly easy to do in light to moderate winds.
Pick the drone up off the ground 5 ' or so and attempt to hold the drone in a steady position with the nose out, you may have to make slight adjustments on the flight stick to hold a steady hover if the drone tries to move around.  This to will take some practice but will help you get the feel of the flight controls.
After you feel comfortable with takeoffs ,landings, and hovering you can attempt the next step.
Flying Forward and Back 
When learning to fly, it is important that your stick movements are gentle, precise and not sloppy to ensure smooth performance from your drone. You definitely don't want to slam or jerk the flight sticks while learning to fly.
Lift the drone off the ground to a safe altitude, not to high though, push forward on the flight stick and push the drone out to 50 ft or so, then pull back on the flight stick and bring the drone back towards you. After you do this several times you can extend the distance outward but you want to keep the model within line of sight, you will need to do this repetitively until you are comfortable flying the drone out and back.

Pilot and his Drone
Flying Left to Right
Take off and Position the drone outward a safe distance in front of you, push the throttle stick to either the right or left and allow the drone to fly either direction with the nose positioned out., try not to turn the drone in any direction, as it will effect the direction of flight.  Again this will take some practice and can become repetitive, until you feel comfortable flying the drone to the left and right of your position.
For several weeks when I went out to fly, I would practice taking off, landing, flying forward and back, and right to left until I was confident I could perform them all safely. Learning how to fly a drone is a repetitive thing, and will come with some practice.
Note: All these training procedures should be performed within line of sight. Without FPV it is difficult to see the position of the drone at long distances.
Basic Rudder Turn
This is where flying can get a bit intimidating and confusing until you get your mind wrapped around it.
Some drones feature headless mode, meaning it doesn't matter which way the drones forward direction is pointing, when you push forward, the drone moves forward relative to your direction.
Lets put that aside and assume the drone you are flying does not have headless mode.
I found the easiest way to learn and practice turning is as close to your position as possible and not at long distance because you can see the position of the drone at all times and won't loose orientation.
Note: Pushing the throttle stick left or right (rudder) will rotate your drone. ( Referred to as Yaw in drone terms).
Take off as you learned previously, with the model directly in front of you push it forward 50 ' foot or so, then stop your forward movement, and rotate the drone (left or right ) 180 degrees until the nose or front of the drone is facing you. (keep in mind that when the drone is facing you the left and right (aileron) flight stick movements are now reversed )  push forward on the flight stick and fly the drone back to your position, stop forward movement,  rotate the drone 180 degrees with the nose facing away from you. At this point you have made 2 turns continue to practice repetitively until your comfortable, you can also extend flight distance as your skills are enhanced.
As you skill level increases you won't need to stop forward movement and just rotate your drone 180 degrees on the fly for a smooth clean turn. Your left and right (aileron) movements will come to you as you learn that when the drone is facing you the aileron inputs are reversed.
As you advance you can apply both rudder and aileron for a banked turn, which is smoother and faster.

In Closing
Be patient, if you fly regularly you will learn quite rapidly as you become familiar with the flight controls and flying characteristics of a drone.
If you continue to use these flight practices early on you'll be surprised how quickly you can master drone flight and improve your flying skills.


Tuesday, December 19, 2017

INTEGY

                                                    Integy RC Parts -Overview


INTRODUCTION

Team Integy
Radio Control Cars, Parts, and Tools
If your a passionate R/C Hobby enthusiast then you may have heard or dealt with the popular R/C parts distributor Integy.
For over 20 years the company has been cranking out high quality parts, tools, and upgrades for some of the most popular brands in the R/C Arena,
They carry an enormous inventory of parts, accessories, and upgrades for popular brand names like Associated, Axial, Losi, Tamiya, and Traxxas to name a few.
Their inventory includes aluminum hop ups, batteries, chargers, electric motors, brushless conversion kits, hardware and accessories, LED lights and accessories, nitro vehicle accessories, shocks, tires and wheels and the list goes on and on.  WOW !  it would be hard to find what they didn't carry.
Many of their parts are custom made, they also make steel roll cages to fit popular off -road vehicles and crawlers.
Many of their precision parts and accessories are made to scale, including luggage trays, winches, and spot lights.
To put it all together you'll need some tools, they over a variety of nut drivers, allen wrenches, pliers and screwdrivers.
If you considering an upgrade to your model or needing parts or accessories I strongly recommend you take a look at their inventory, I think you'll be amazed at what they have to offer.
You can visit their online catalog and store integy.com

UNIQUE PRODUCTS

Sand & Snow conversion Kit 
Integy Tracs for Snow and Sand Applications

fits Traxxas 1 10 Stampede and Slash 4x4 models
With this sand and snow conversion kit (sold in pairs), you can take on a whole new world of adventures.
Tenegy recommends that the pinion gear size be dropped to at least 13-tooth, for adequate torque without overheating your ESC.
The package consists of durable molded construction,  retainers for hubs, spring-loaded tensioners, and durable rubber chevron treads.
Color options include white, red, orange, gun metal, green, or blue.


integy
Integy LED Light Bar for 1/10 Scale Crawler
LED Spot Light for 1/10 Scale Models
Don't let your off-road excursions end when the sun goes down, extend the fun well into the night with a set of bright lights.
Add a realistic touch to your Crawler or Desert Buggy with this sharp looking bar of lights that feature individual LEDs that really light up your darkened path.
This particular roof light bar measures 113mm x 19mm x 27mm and available in silver, red, orange, gun metal, blue, and black colors.
This product may take some prep before they can be installed on your model.

VIDEO


Winch for 1/10 Scale Rock Crawler
Integy Winch for 1/10 Scale Rock Crawler


If you get in a bind with your 1/10 scale Crawler, and are fortunate enough to have outfitted you R/C rig with one of these realistic looking T10 winches you won't have to worry.
The detail on this winch is really impressive.
The setup includes the pre-wired toggle switch harness, metal fairlead, steel cable and hook, an aluminum case, and motor.
The winch has been Billet Machined and comes in either silver, red, gunmetal or black.


Shock Set Traxxas 1/10 Stampede 4x4
Integy Shock Set for Traxxas 1 10 Stampede 4x4
Looking to upgrade your off-road experience?These premium machined piggyback shocks are sold in a set of 4 and can be bolted to your chassis using your factory mounting points and hardware. Easy to install.
Shock Features:
Adjustable compression dial
Pre-load retainers
O-ring type seals
Smooth sliding shock shafts
External oil reservoir
Aluminum caps
Aluminum shock bodies

             Shock Length:Front 88mm Rear 103mm


FINAL THOUGHTS
This is just a small sample of some of the more unique products that Integy offers, they certainly have just about all the upgrades and accessories one could think of for name brand RC models.
I am certainly impressed with the quality and sheer volume of their inventory as are many other modelers out there that use this valuable resource to their advantage.
For more information on many of the models their parts support visit our website airarmorrc.com

Sunday, December 10, 2017

TRAXXAS STAMPEDE 2WD

                                           Traxxas Stampede 2WD -Overview


INTRODUCTION

Traxxas Stampede 2WD
by Traxxas
One of the first Monster Trucks ever released from Traxxas was the Stampede XL-5, and that takes us back aways, to 1994 to be exact, over 20 years ago.
Since then a few innovative upgrades that Traxxas is known for, have been made to improve the performance and efficiency of the model.
The Stampede comes fully assembled and ready to run within minutes out of the box, once you charge the battery of course.
3 Driver Profiles are available on the model, this innovative feature includes a Training mode, which is great for beginners who may have never driven an RC Monster Truck before.
An optional 23-tooth pinion gear is included, which can push the Traxxas model over the 30 mph mark.
A sharp multi-colored ProGraphix body including pre-applied graphics enhance the 2WD Stampede's appearance.
And it is all backed as always by a friendly, knowledgeable, support team at Traxxas, available to answer any questions, or address any of your concerns, Mon - Fri. 8:30 a.m. to 9:00 p.m. CST.
U.S. residents 1-888-872-9927.

traxxas stampede 2wd
Traxxas Stampede 2WD RC Monster Truck
KEY FEATURES
Traxxas Stampede XL-5
Titan Brushed Motor - the 550 modified motor from Traxxas includes an internal fan to help keep the motor cool, a common problem with brushed motors.
The armature in the motor is oversized and features copper wire for handling the power and torque of the 12 T motor.
These motors provide good torque and moderate speed without any upgrades. If properly maintained they will last a while.
Break them in according to instructions covered in your owners manual.
The lifespan of the motor depends on the environments you run them in. If you run them outdoors in dusty conditions the lifespan will be reduced. It is a good practice to blow them out with an air hose after using them.
If you overheat them they won't last very long, make sure you have them geared properly.
Sealed Electronics  XL-5 ESC, Servo & Receiver
Sealed Electronics - all the electronics on board the Stampede XL-5 are in sealed cases or boxes to protect the components from dirt, mud, and water.
Let me make a point here, the components themselves are not waterproof, but the case or box they reside in is sealed to protect the internal parts from the elements.
Electronic Speed Control -the XL-5 ESC is sealed from the elements, and designed with some nice features, including thermal shutdown protection, low voltage detection, and 3 throttle modes.

Training Mode -great for beginners ( Throttle is reduced to 50%)
Sport Mode
Race Mode
The ESC is designed to handle either 540 size motors (15-turn) or 550 sized motors (12-turn) and has a TRX connector.
Includes an on /off switch, with an easy one -button setup.
Compatible with NiMH NiCad, or LiPo battery packs.
#2056 Steering Servo - o-ring seals are used to protect the servo components in wet environments.
The servo delivers 80oz in. of torque. Speed -0.23 sec / 60 degrees.
One downside to the servo is,  it has plastic gears, if your are a hardcore basher and run hard you may want to upgrade to a metal gear servo.
3 Channel Receiver - the receiver is concealed inside a receiver box, and free from debris, dirt, and water.
It is easy to access for maintenance.
The receiver is easy to bind with the LINK button, an LED indicates bind status along with power on.
Note: Do not cut or attempt to shorten antenna, it can and will affect the range of the model.
If you happen to experience signal loss, the receiver will return the throttle to neutral and hold the last steering input from the transmitter.
video


Drivetrain and Chassis Components
Transmission -The Traxxas Stampede 2WD R/C truck includes a  Magnum 272 transmission, with ball bearings throughout and 48 pitch metal gears, responsible for transferring power to the driveshafts.
Driveshafts- ( telescoping U-joint driveshafts).
The maintenance free gear diffs use internal gears constructed of hardened steel, a sealed gearbox protects the internal components from dirt and debris.
The transmission is durable and capable of handling brushless power if you choose to upgrade.
Slipper Clutch - semi-metallic pads along with finned pressure plates are utilized to dissipate heat, while providing consistent traction.
The material used on the pads remains stable even with a wide range of temperature changes, providing smooth consistent engagement over an extended period of time.
When it comes to removing and replacing spur gears, the process is easy and won't effect any previous slipper clutch adjustments.
Oil filled Shocks - an X-Ring is utilized for sealing purposes, the shocks are tuneable with a variety of ready available springs, pistons and oils.
To separate air and oil within the shocks pressure bladders have been integrated, along with spring clips for adjusting pre-load and ride height.
The shock springs have been sealed with a white powder coat finish.

2.4 GHz Radio
The TQ transmitter is easy and simple to use, just simply turn on the transmitter, power up your Traxxas Stampede and your ready to run.
The transmitter is designed to fit comfortably in your hand, you don't have to worry about interference, you can stand side by side with multiple drivers and you won't encounter any interference from their presence.
The antenna is neatly tucked away inside the transmitter and protected from external forces, while providing long range performance and control.

ADVANTAGES
Affordable
Pre-Assembled - Ready to Run
Great entry model for beginners 
Training Mode - ( Throttle cut to 50%)
Readily available parts and upgrades

DISADVANTAGES
Comes with car charger ( doesn't sit well with some owners) adapters sold separately

FINAL THOUGHTS
If your a beginner who is interested in getting involved in the hobby, the Traxxas Stampede 2WD monster truck is certainly worth taking a look at.
It is reasonably priced, and has been designed with the beginner in mind. Upgrades and parts are readily available and easy to install.
For more information on the model visit our website airarmorrc.com


Wednesday, December 6, 2017

BLADE 200S

                                          Blade 200S - Overview


INTRODUCTION

Blade 200S
This particular heli  has been upgraded and modified from its previous version the Blade 200 SRX.  A few modifications and tweaks were made to the r/c helicopter and it does include Safe Technology.
The 200S is a fixed pitch helicopter, not a collective pitch heli, will fly much like a drone, designed for outdoor or large indoor facility flight.
The Blade 200S  is a good step up for pilots who may have flown quads or small  indoor heli's,
very docile on altitude changes, self leveling, has angle limits, pilots don't have to worry about getting out of control or flipping the heli over.
It is very easy to learn collective management, this helicopter is great for performing basic aerobatics, and maneuvers, a great model to grow and advance with.


KEY FEATURES
blade 200 s
Blade 200 S Radio Controlled Helicopter
Safe Technology
SAFE ( Sensor Assisted Flight Envelope) is designed to utilize multiple axis sensors, along with software, that allows the heli to know its position relative to the horizon.
This awareness is used to create a controlled flight envelope the heli can use to maintain a safe amount of bank and pitch (angle) for safe flight.
These protection features on the Blade 200 S allows for multiple modes for the pilot to choose from to enhance skills with a greater sense of security and flight control.
Benefits
SAFE provides protection you can enable with a flip of a switch on the transmitter, multiple flight modes allow pilots of the Blade 200S to adapt the SAFE technology to their skill level instantly.
Every model with SAFE installed is optimized and ready for use.

Flight Modes / Rate Selection
Pilots can change rates on the transmitter by moving the two position dual rate switch.
Low Rate - beginners should use the low rate for initial flight, the rate reduces the control rates.
High Rate - allows pilot to have full control, should only be used by intermediate to advanced pilots.
Stability Mode - in this mode bank angle is limited to 40 degrees, when the cylic stick is released the heli returns to level flight.
Intermediate Mode - in this mode bank angle is limited to 60 degrees, when the angle stick is released the heli returns to level flight.
Agility Mode - No limitation to bank angle, when cylic stick is released heli returns to level flight. Great for Aerobatics !
video


Throttle Hold 
Used to prevent motor from powering up accidentally, turn the throttle hold on anytime for safety purposes like checking the direction of the controls.
Throttle hold can also be used to shut the motor down instantly if you lose control of the helicopter, in danger of crashing or both, just remember the blades will continue to spin briefly after initiating the command.
You will still have directional control if throttle control is activated.
Panic Recovery
If for any reason you lose control of the helicopter in any mode, simply push and hold the panic switch and move controls to a neutral position. SAFE technology goes to work to return the Blade 200S to upright and level position, if model is high enough off ground with no obstacles in its path.
Simply release the switch to turn off Panic Recovery and return to current flight mode.

IN CLOSING
The upgrades on the Blade 200S will definitely benefit beginners looking for a Heli that they can grow on and enhance their flying skills, while advancing thru the flight modes without having to purchase several r/c helicopters.
For more information on the model visit our website airarmorrc.com


Tuesday, December 5, 2017

PROTEK RC

                                                  Protek RC - Overview


INTRODUCTION

Protek the Company
After you have been in the RC hobby for a while, you begin to search for good high quality parts and accessories to maybe replace or upgrade on your model or models.
It's nice to know that companies like Protek are around to serve the RC community with quality products and support.
Protek actually got its start believe it or not in a garage by a man determined to provide RC enthusiasts with dependable products at a reasonable price.
After a lot of hard work and determination, Protek RC has not only become a source for o-rings and bearings, because there lineup runs much deeper than that, including batteries, battery chargers, and servos to name just a few.
Along with accessories Protek also handles tools to install the accessories, how about track
accessories ? Yes, they have them, from hauler bags and pit gear, to nitro accessories.
Well maybe your an airborne RC enthusiast, Protek RC carries a large variety of electric and gas airplane props.
Protek products are developed by an innovative group of RC enthusiasts, with a passion for the hobby.
Like any successful RC accessory company they back it all up with knowledgeable customer support team.
They can be contacted from 7 a.m. to 6 p.m. Mon.-Fri. at
1-800-705-2215 (Toll Free)


PRODUCTS AND ACCESSORIES
Protek RC 14.8v  4 Cell 5000mAh 100C LiPo Battery Pack

Batteries - the roar approved batteries range from 35C to 100C rates to adapt to any application.
Surface Packs - have very high discharge rates with the capacity for applications from smaller packs to high voltage packs for 1/5 scale models.
Protek RC offers supreme power packs that pack a punch and deliver good runtime for any model including 1S pan and 1/8 scale vehicles.
The sport race 3S pack from Protek RC provides plenty of power to get all the speed out of your Traxxas VXL equipped model.
Protek also carries NiMH, LiFe, and LiPo receiver packs for nitro models and LiFe and LiPo transmitter packs for your controller.
Last but not least a 4S pack is available to deliver power to your starter box, along with a handful of nickel packs for the younger crowd.
Flight Packs - ProTek provides flight packs with exceptional discharge rates, along with the capacity for a variety of aircraft applications.
1S and 2S micro LiPo packs for aircraft range from 25C to 35C, along with 2S, 3S, and 6S LiPo packs ranging from 20C to 70C.
A large selection from ProTek RC are designed to keep your aircraft airborne longer.

Chargers 
Protek RC Prodigy 680 Balance Charger
USB Charger - you'll have the ability to charge all your accessories in the field or at the track with a 2S - 4S LiPo battery.
Prodigy Touch - 680 features an easy to use touchscreen with all the amenities of a pro-level charger.
Prodigy 612 Duo - is a 10amp dual port battery charger, capable of delivering 200 watts of power per channel, you can charge 2 packs up to 6S at the same time.

protek rc
Protek Brushless High Voltage 1705 BL Servo
Servos -Protek RC servos are durable, reliable, and affordable, from high voltage competition servos down to upgrades on cheaper servos found on most RTR models.
Protek 100, 200, and 300 series servos have good power over the competition, they are consistent, reliable, strong, with fast transit speeds, and precise centering.
Protek labels their servos after the number with a T or S, the T series servos are suited for applications that require more torque than speed, S series servos have less torque, with faster transit speeds.

Car Servos 
170S and 170T Team Edition - these servos are designed to provide, quick high speed response with the torque competitive drivers demand, these high quality servos are extremely reliable.
150S and 150T servos - have an aluminum case, with metal gears, for increased durability,
With 6.0V the 150S is a perfect fit for 1/10 scale electric models, because of its quick transit speed.
with 7.4v the 150S is a good fit for nitro touring models. The 150T is a good choice for monster trucks and crawlers. with 7.4v it is a good application for nitro powered monster trucks, and any 1/8 scale nitro vehicle.
130S and 130T servos - when you need precision control the heavy-duty metal gears along with high voltage circuitry that won't cost you an arm and a leg.
The 130S is a good choice for lighter 1/10 electric cars, with 6.0v.  If you increase the volts to 7.4 the 130S becomes a good steering and throttle servo in 1/10 scale nitro touring model, or any setup that requires quick response with 150oz in of torque.
Heavier 1/10 scale cars are a good fit for the 130T with 6.0v, but at 7.4v it becomes a good fit for 1/8 scale on-road nitro and 1/8 scale buggies.
100T / 100S servos - perfect upgrade for cheaper servos found on a fair amount of RTR cars.
The 100S is good for smaller lightweight models that require fast transit speeds, the 100T is a good pick for 1/10 scale and heavier models that require additional torque.

Heli Servos
Designed for Heli enthusiasts, the 270 TBL/SBL - the 230 series is priced competitively, with all around good performance.
The 230T  high voltage servo and the 230S tail servo have durable metal gears and 1520/333 Hz frequency with quality electronics, make them a good choice for models using standard size servos.
In closing -
The Protek 250 series servos were designed for high performance, these servos are identical to the 230 series on the inside, with same gears, electronics, and performance.
The difference is in the all-aluminum case, that is durable and dissipates heat really well.

Tool / Gear Hauler
Protek RC Tool and Gear Hauler


In order to transport gear and keep it organized, safe, and secure, Protek RC offers their unique hauler.
The hauler features numerous storage drawers, along with velcro and zipper sealed pockets to protect your items from the elements.
It is easy to roll around with its trolley wheels and retractable handle, and also includes a carrying strap.
To add a nice touch to the look Protek finishes off the appearance with Protek RC Logos.


ACCESSORIES
Nitro Accessories - Protek RC offers nitro users several key components to assist them in the operation of their model,  including glow ignitors, fuel bottles, starter kits with tools, air filters, and off road clutch components for 1/8 scale vehicles.
Bearings / Hardware - if you need to replace bearings Protek carries a variety of affordable steel bearings for multiple applications. If you are set on only the best Protek RC offers high quality, lightweight, ceramic bearings.
If your in need of hardware Protek offers metric grade, high strength screws, nuts and washers.
Connectors and Wire - When it comes to connectors and wire Protek delivers with battery pack adapters, extensions and charge leads.
When it comes to customizing your own wiring their line of pigtails, connectors, heat shrink, and balance accessories are hard to beat.
Tools - Protek RC carries the tools that can not only get the job done, but get the job done right.
Their high quality affordable line of tools include hex wrenches, in standard or metric sizes.
Specialty tools include wheel wrench, shoe tool, multi wrench, spring remover, and flywheel puller to make working on your model an enjoyable experience.
The tools are available in single, complete, or combination of the two.

FINAL THOUGHTS
It is always comforting to know that there are good quality, affordable choices out there when it comes to upgrading or repairing your RC models.
Protek RC carries a nice lineup of readily available accessories that are there if and when you need them.

To view many of the models that support their products visit our website airarmorrc.com

Friday, December 1, 2017

GPM RACING

                                            GPM Racing Products - Review


INTRODUCTION


The Company
GPM Racing Products
If you take your RC Racing seriously you may want to consider GPM Products for aluminum parts upgrades on your RC models.
GPM PARTS.COM consists of a group of professional individuals that possess a passion for radio control, and the models the hobby represents.
They are an individual authorized dealer of the GPM Racing Team, striving,focusing, and ensuring their customers are receiving high quality upgrades and products at an affordable price.
GPM specializes in aluminum and alloy parts for name brand RC models including Arrma, Associated, Axial, Team Losi, and Traxxas to name a few.
They offer an enormous selection of  sophisticated RC parts for the serious RC racing enthusiasts involved in the hobby.
From A-Arms to Body Mounts and everything in between, rest assured the Team at GPM Racing is there to meet any or all of your needs.

PRODUCTS

A-Arms 
gpm racing
Aluminum Lower A-Arms on Axial Yeti

The aluminum A-Arms from GPM Racing come in a variety of colors.
The bright colors really stand out and give your model an impressive appearance.
Included in the package are the (2) A-Arms
they come in pairs whether they are for the front or rear of the model.
(4) Stainless Steel Button Head Screws
(2) Stainless Steel Pins
The A-Arms are made of high quality 6061 T6
Aluminum.


Knuckle Arm Assembly
Alloy Knuckle Arm Assembly on Traxxas E-Maxx
The Aluminum Knuckle Arm Assembly comes in a variety of colors depending on your model.
The knuckle arms are a precise fit, with virtually
no tolerance.
The knuckle arms can improve steering performance.
1 pair per set.
Package Includes:
(2) 6 x13 x 5 bearings
(4) 10 x 1.5 o-rings
(4) Hex Dust Caps
(4) Dust proof Caps
(4) Delrin Screws

GPM Shocks
GPM Adjustable Shocks on Traxxas XO-1
The adjustable spring damper shocks are of the highest quality, and look great to.
They come in Red and Blue colors with a GPM logo on them, and individually packaged which is nice.
The shocks come pre-filled with fluid inside them.
Package includes:
(2) Aluminum Collars 3 x 6 x 3
(2) Aluminum Collars 3 x 5 x 5
(2) Aluminum Collars 3 x 7 x 17.5
(2) 3mm threaded locknuts
(2) Stainless Steel button head screws 3 x 18
(2) Countersink screws   3 x 35

video


FINAL THOUGHTS
This is just a small sample of the readily available parts from GPM Racing, if your looking for aluminum upgrades they certainly have an impressive inventory of high quality products.
For more information on the models they support visit our website airarmorrc.com