Friday, August 25, 2017

BALANCING RC AIRPLANES

                                        How to Properly Balance RC Airplanes


INTRODUCTION


balancing rc airplanes
High Wing RC Plane resting on CG Machine
Why is balancing rc airplanes so important ?
A properly balanced rc airplane is a top priority for a number of reasons. Number one if we consider the balancing process from a safety standpoint, it quickly becomes a major factor.
An incorrect CG or improperly balanced rc plane can be a handful to control, which can lead to a crash or even worse someone being struck by the model.
An old saying that has been around for awhile, a nose heavy plane flies poorly, but a tail heavy plane only flies once. 
All rc airplanes ( and all aircraft for that matter) have a specific CG point or position, this is the point at which the plane balances fore and aft accurately.
CG points are determined during the design phase by the manufacture of the airplane and properly displayed on a plan for your reference. If you have purchased an RTF or ARF model the included instruction manual will more than likely give you the CG point, which normally is a distance measured from the leading edge of the wing or sometimes from the nose of the plane.
If you have built your model from a set of plans or kit the CG position should be clearly marked on your set of plans.
An accurately balanced rc airplane is easier to fly and control, and more importantly, it is safer. A correctly balanced airplane will not need much trim set on the transmitter.

BALANCING PROCEDURE


Low Wing RC Plane on CG stand
CG machines-make it easier to balance your rc airplanes. There are a number of manufactured balancing CG machines on the market today.     You can also make your own CG machine with a few unused materials that you may have lying around your shop. (See video below)                   Balancing RC Airplanes
1. When balancing a plane with an engine, check to make sure the fuel tank is empty before attempting to balance the plane.
2. Place a mark on the wing with the pre-determined CG location found in  your manual or on your plans if you have built your model from a kit.
With the model facing towards you, place your index finger on each wing half precisely where your mark was made.
3. Raise the airplane gently. When your model is correctly balanced it will set level on your fingertips with the nose very slightly downward. (Your model will be more stable if slightly nose heavy)
Remember if it is to nose heavy the airplane will be sluggish and slow to respond to elevator control inputs and will land extremely fast.
Balancing RC Planes with Low Wing 
In order to correctly balance these airplanes, it will require that the plane be positioned upside down (See photo above) 
The balancing process is more accurate because low wing models are typically more stable when inverted (upside down)
When balancing rc airplanes a high wing airplane is balanced right side up.
(See the top photo above)

Attempt to Balance without adding Weight
When balancing rc airplanes you will want to minimize any additional weight if at all possible while attempting to balance your model.
This can be done by moving components fore or aft like the battery pack. If your plane is nose heavy and you have room, try moving the battery pack back, if your plane is tail heavy attempt to move the battery pack forward in an effort to balance your airplane correctly.
This may require positioning components a few times until the plane is correctly balanced.  After the plane is properly balanced make sure you secure all the components before flying your model.
Adding Weight to Balance Airplane
Sometimes when balancing rc airplanes the plane cannot be balanced without adding weight. It is important that the added weight be placed and secured as far away as possible from the CG (center of gravity) to minimize the amount of weight to be added.
Tail Heavy - secure weight on the firewall.
Nose Heavy - Secure weight as close to the end of fuselage as possible. (On or under horizontal stabilizer is always an option) Or you may want to cut a small area near the rear of fuselage covering in order to place the weight on the inside where it cannot be seen, then reseal the covering.
Obtaining weight for you Model
You can purchase balancing weight from your local hobby shop or online websites. (Note: The sticky pad on the back of weights purchased from hobby shops can vibrate loose,  I recommend using epoxy or glue to secure them).
Other Weight Options-you can also use nuts, bolts, lead fishing weights or anything that can be securely fastened to the airplane.

Balancing Plane from Side to Side
This balancing procedure is not as critical as the nose to tail balance.  It is always good to check it though to ensure the plane performs well while doing any aerobatic maneuvers.
Place the spinner on a table or workshop bench bench, then while holding the airplane up by the tail, place the tail on the backside of one hand, and see if it tends to roll one way or the other.  You will want to do this several times, if it rolls the same way numerous times the wing is out of balance. Finding a wing out of balance is not something that occurs very often.
Adding Weight to an out of Balance Wing 
You will want to position added weight as close to the wing tip as possible to minimize the added weight. Securing the weight to the outside will not look very good, I recommend cutting an access hole in the covering on the underside of the wing, then secure the weight with glue or epoxy, and reseal the covering.

CG Adjustments
After you have test flown your model rc airplane with the CG in the recommended location listed in your model or on your building plans, and are comfortable with the handling of your airplane, small adjustments can be made. You can move the CG back slightly, which will make the plane more aerobatic.
If you prefer to do this make sure that your adjustments do not exceed 1/8".

Final Thoughts
Balancing your rc airplanes is important and relatively easy, even for beginners.
If you have rc airplanes constructed of foam, stick pins and small nails can easily be pushed into the fuselage or wing to add weight, and are easily hidden from sight.
For more information on a variety of rc models visit our website airarmorrc.com

Wednesday, August 16, 2017

HELI-MAX 230SI QUADCOPTER

                                   230 Si Advanced Quadcopter Report 


Heli-Max 230Si Upfront


heli-max 230 si quadcopter
Heli-Max 230 Si Quadcopter
For those quad enthusiasts seeking a little larger machine than their smaller palm sized counterparts, that's budgeted below the 350 and 450 size drones the Heli-Max 230Si quadcopter may just be the ticket for you.
Nice design, with an enticing look.
Appears to have the ability to be a good sport flyer outdoors, yet small enough to be flown indoors.
On board the Heli-Max 230 Si Quadcopter is the attached HD camera capable of capturing video with 720p at 30 frames per second and still photos as well .
You'll notice on the outside of the box a carrying handle has been integrated into it's design  for easy transport for the quad and extra accessories.  Upon opening the box you will find all the components safely packed in place, to safeguard the contents during shipping.
Inside you will find an owners manual, a 2 GB micro SD card along with a card reader, nice !
Included with the Heli-Max 230 Si Quadcopter are the AA batteries for the transmitter, Lipo battery for the drone, AC adapter and charger, extra blades, along with a screwdriver for removing and fastening the quad components. Everything you need to fly is included in the box.

PERFORMANCE FEATURES

Altitude Control Management -
The feature allows you to set or control the height you want the heli-max 230Si quadcopter to fly at, until you disable it. After the altitude is set it will not exceed the designated height, but allows you to move the quad in any direction.
The altitude can also be manually controlled.
Actual Directional Control-
This feature is normally found on more expensive models so it is a surprise to see it featured on the heli-max 230si quadcopter. Normally on quads you have a front and a back, left and right when you move the flight controller stick,  but with actual direction control the directional orientation of the quad does not matter.
If you push the flight stick forward the quad moves away the pilot even if the front of the quad is facing the pilot. Left and right control inputs move the quad left and right of the pilot regardless which way the quadcopter is facing. In order for the feature to work properly the transmitter antenna must be pointing directly at the quad.
Fail Safe-
The fail safe feature on the heli-max 230 Si is designed to protect the quad if the battery expires or a signal is lost.
This fail safe feature maintains the quads altitude and slowly allows it to descend to the ground, keeping the heli-max quadcopter from falling to the ground from a high altitude and damaging it.

Return to Pilot
This feature is used when you fly at distance, loose orientation, or can no longer see the model clearly. By pressing the ICM button once the quad will fly back towards the pilot. In order for this feature to work properly the transmitter antenna has to be pointed directly at the quadcopter. To return to normal flight simply move the right stick to the right
Stability-
On board the heli-max 230 Si are 3 accelerometers and 3 gyroscopes, to keep the quad stable when it begins to bank, tilt, or it is knocked off course, it responds quickly, and makes corrections, without any controller commands while on the beginner mode.
Dual Rates-
Low Rate is used to reduce the rate of motion or pitch of the quad, especially important for beginners.
High Rate is notably more aggressive and recommended for more experienced pilots. High rate tends to make penetration into the wind easier.
Camera Footage and Storage-
The onboard 720 p HD camera can capture video and photos from the quadcopter, it can also be upgraded to up to 32GB. Included is a 2GB micro SD card with a converter, but is not capable of storing a full flight video. There have also been some problems with the quality of imagery using lower sized micro SD cards
Flying Modes - .
There are 2 different flying modes that the Heli-Max 230 Si Quadcopter has, beginner and expert.
Beginner mode allows pilot to benefit from the stability features in order to make the handling easier.
It allows beginners to enhance their skills with the maximum stability until they are comfortable with the quadcopters behavior..
Expert mode turns off some of the stability features which makes controlling the quad a bit more challenging. Expert mode requires the pilot to self stabilize the quadcopter and compensate for wind, obstacles, and any other encounters.
video
ADVANTAGES
Great for beginners with the stability features on board along with the Fail Safe option if the unexpected occurs.
Can be flown indoors or outdoors do to its size.
Various flight modes are an advantage giving you an option to challenge yourself as your skill level is enhanced.
DISADVANTAGES
One Downside is its lightweight, which can keep you from flying on windy days and can be a challenge to handle in moderate to high winds.
Battery life on this quad like many of the other smaller quads is relatively low around 10 minutes or less.
Although you can by multiple batteries to extend your flying time.

For more information on the Heli-Max 230si Quadcopter visit our website airarmorrc.com

Tuesday, August 15, 2017

RC SERVOS

                                 Difference between Analog and Digital Servos


SERVO FUNCTIONS

Note: First thing to remember there is no physical or main component difference between an analog or digital servo. The difference is the way they perform or do their job. 


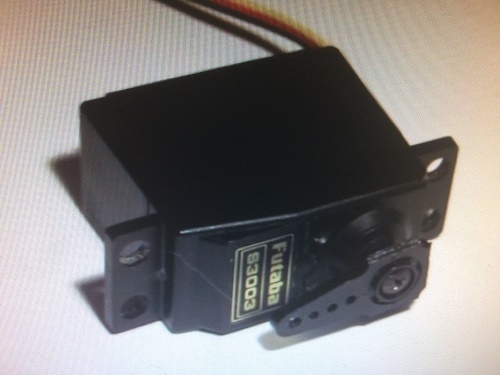
Futaba  Servo
Analog
RC Servos were all analog originally, and are still widely used today in sport flying applications. To drive the motors in the servos standard transistors ( PNP and NPN) were utilized.
When inputs were initiated by the operator via the transmitter, voltage to the servo motor would be transferred and the motor would start turning.  The downside to this control system was that a certain quantity of dead band was present on smaller control inputs, because a couple of volts had to go across the motor before it reacted and started to move, usually slowly with a limited amount of torque.
As the movement ended the voltage tapered down as the servo moved to its new position and never quite got to its final destination.
Before digital servos came along operators and pilots never really noticed or understood it at the time and learned to compensate for it.

Digital 
rc servos
Servos mounted in Fuselage of Plane

FET transistors are used in digital rc servos like ESC's or speed controllers.
Transistors deliver full voltage in a pulse like modulated fashion, instead of ramping up the voltage to the motor the same way a speed controller does with a brushless motor.
Operating in this manner, the motor can deliver maximum torque right from the start, for moderate control inputs, and can precisely match the position of the stick for higher resolution and centering control.
They also provide the power to the servo at a significantly higher rate, about 400 Hz as compared to 50Hz for a standard analog servo. Consequently the servos respond quicker to control inputs and gives an instant feel to the control element.
When the application requires precise accuracy and speed, digital rc servos can deliver it and make a substantial difference.
Because of the updated faster rate,.digital servos often whine or buzz some around the neutral position

Downside - the downside to digital rc servos, they definitely pull more current than the standard analog servo. With that in mind, you will need to make sure to use a battery large enough to power them.

 Servo with covers removed
Hopefully this simple informative page on servos helped explain the common differences between analog and digital rc servos.
Many models on the market today utilize both of the applications presented here, you can check out many of the models on our website airarmorrc.com  


Monday, August 14, 2017

RC GLIDER

                                                    Calypso RC Glider


rc glider
Calypso RC Glider


FLIGHT PACKAGES

The 73" Calypso electric powered glider is available in 4 different versions.
RX-R meaning receiver ready ( Includes brushless motor and ESC- Electronic Speed Control  with servos)
RTF meaning ready to fly (Includes Tactic TTX 404 Transmitter)
ARF meaning almost ready to fly (allows the purchaser to use the equipment of his or her choice)
TX-R  meaning transmitter ready glider. With this package a 6 channel SLT  2.4GHz Tactic receiver is pre-installed, awaiting a bind using either a Tactic 2.4 GHz transmitter or the new Tactic AnyLink SLT 2.4GHz universal radio adapter- ( Compatible to most major brand radios).
This transmitter ready package takes about 30 minutes to assemble with no glue necessary.

APPEARANCE

The color scheme is really nice, bright, and easy to see. Aero-Cell foam( EPO and CA safe) is used for the construction of the Calypso, providing a smooth flying surface, expertly molded and durable.

ASSEMBLY PROCESS
Calypso Parts before Assembly

A few items will need to be assembled and installed, the tail and wing will need to be assembled, the electronics will need to be installed.
Tail Assembly- Before assembling any of the components it is recommended that you work and flex the rudder and elevator at least 100 times to free up the hinges, as you work them they become easier to flex, this decreases the torque required by the servos.
The horizontal and vertical stabilizers are easily fastened with one bolt. The vertical stabilizer slides down into the horizontal stabilizer. The 3 step tail install ends with a well designed tight and molded fit.
Wing Assembly- The wings on the Calypso rc glider are large and deliver incredible lift. The two piece wing design is joined with a carbon spar. A unique feature is used to keep the wings together with locking bolts.
The process requires installing the spar, and sliding the wing halves together and tightening the locking bolts.
The last step is to connect the aileron servos to the receiver. ( Servo leads are long - Nice ! )
Fuselage- The 47" fuselage is straight and precisely molded, the length of the fuselage adds some flight stability. The streamlined fuselage has a large area for housing the electronics, with a magnetically attached canopy, with a nice tapered sculpture transition to the tail section. Plastic sleeves house all the linkages with a bolt securing the clevis.
Under the cabin of the fuselage is a large wheel is installed to protect the Calypso from any damage upon landing. A cooling exit port is integrated on the bottom of the fuselage also. A skid plate is included on the nose along with a folding prop (9 x 5).
The servos are glued in place and the 2.4 GHz Tactic receiver is attached to the sidewall.
Radio installation with the TX-R AnyLink
Link for more information on AnyLink 
With the TX-R AnyLink you should be able to bind most brand name radios, included in the package are the transmitter module and two sets of cables.
The cost of the TX-R AnyLink is around $25.00 dollars
Following the directions you should be able to set all the parameters necessary to fly and mix the tail to ailerons. Dual rates and expo are also included in the setup.
After centering the transmitter sticks, you can adjust the control surfaces, with the settings provided in the instructions in degrees, mm, and inches.
It is recommended that you calibrate your throttle stick (Applies to RX-R and Tx-R versions) to insure synchronization between your throttle and ESC.
Be sure to take your time centering the control surfaces, do not over-tighten clevis.
Remember the first flight setting is in the third hole, not the outer hole.

PERFORMANCE


Flying
The electric powered Calypso is a great soar plane, fully capable of gliding !  Note: Not the case with all powered gliders.
How do you know ?  Cut the throttle and be assured that the Calypso is a superb soaring plane.
The Calypso is capable of handling high winds and actually hovers extremely well into the wind.
Penetration is good, and lift is strong.
The Calypso RC Glider is very stable in flight even in gusty strong crosswinds, and control is easy to maintain.
Under power the Calypso tracks true and straight with amazing vertical performance.
This model is capable of handling the elements of flight on those windy days.
Takeoff and Landing
A simple hand launch is enough to get the Calypso airborne. It climbs out well, landings do require a long final approach, the lift even in a slight breeze keeps the plane from wanting to land. Upon landing the roll out can be virtually zero into a fairly high wind. Flaps can be a great addition.  (Optional flap kit sold separately).
Aerobatics
The Calypso is limited to loops and some inverted flight, the large wingspan tends to negate even aggressive aileron input to get a good roll started. Be cautious while flying inverted, getting the Calypso rc glider inverted is not difficult as you are inverted at the top of a loop, but trying to get out of the loop the Calypso wants to nose down coming out rather than climbing.
Make sure you have some air under the glider before attempting inverted flight.  Rolling out is slow !

CALYPSO OVERALL 

Great performer ? In my opinion and others who have flown the model I would say, Yes !
It is a good RC Glider for beginners !  Being a parkflyer this is one that is very fun to fly. Altitude changes are slow and easy to control. Actually all levels of pilots will enjoy the Calypso, beginners that are not skilled in finding thermals and lift can still get several climbs at full throttle.
Flaps can provide quite a change in the experience, and really slow the  glider down, the increase in flaps can provide lift in mild winds.
Advantages
With a little assistance beginners can fly this plane
Variety of versions available - to meet your needs and budget
Bright graphics - easy to see
Great flight characteristics - smooth, forgiving
Assembles with 3 screws ( no glue required )
Disadvantages
Recharging Batteries - approximately 1.5 hr per charge

For more information on the Calypso RC Glider visit our website at airarmorrc.com

Friday, August 11, 2017

NITRO VS ELECTRIC

                                     RADIO CONTROL  DEBATE : NITRO VS ELECTRIC


                                                       Exploring the options

The Debate continues, which R/C power-plant is the best choice for me ?
There are advantages and disadvantages for either option.   There are a number of  factors to consider before making your choice. You may have to ask yourself a few questions that can help you determine which is the better application for you.
Maybe your new to the R/C hobby and aren't quite sure !
Have you decided on how you want to utilize your R/C vehicle ?  Possibly off-road in the dirt, maybe over rough-terrain, or possibly on smooth pavement, or possibly all three.
Are you looking for Speed ? Power? Performance ?  These questions can help you determine which choice may be the best one for you.
Let's take the debate one step further, nitro vs electric, and look at the pro's and con's of each option.

                                                          ELECTRIC 

Advantages
Quite-if used in residential area
Traxxas Titan 550 T

Great for beginners
Easy to operate
Minimal Engine Break-in time required
No Engine Tuning involved
Maintenance is minimal
Cleaner - no fuel residue after running
Charge Battery and run

Disadvantages
Run times will be limited as batteries will have to be recharged.
Power in Electric models may not be as extensive as Nitro Power.
Vent holes in brushed electric motors are more prone to debris and water. Not as vulnerable as long as  body remains on vehicle.
Slower than brushless electric motors and Nitro engines.

                                                              NITRO

                                                                                   Advantages
nitro vs electric
TRX Pro.15 

Some model enthusiasts enjoy the sound and realism of a nitro engine.
Faster than most electric and some brushless motors if tuned properly.
Engine can be tuned for maximum performance.
Opportunity to enhance mechanical skills such as tuning.
Longer runtimes (just add fuel)
More water resistant than their electric counterparts

Disadvantages

Loud and Noisy ! Can disturb others in your neighborhood if used within a residential area.
Requires some mechanical skills,  engine break in,  tuning, and periodic maintenance.
Fuel purchase over a period of time is an added expense. Purchasing fuel can be an issue if there is not a hobby shop near you.
Many Nitro powered vehicles do not have reverse.
Fumes from the engine permit model from being used indoors.


FINAL THOUGHTS

There is one more option that you may want to think about before making your final decision between nitro vs electric.
If you feel like the electric motor option is the best choice, you may want to consider a brushless motor. Although they are a little higher priced there are some advantages. With no brushes to wear or heat buildup from friction, the life of the motor is extended. Vent holes are not needed, with the case being sealed, you won't have to worry about water or debris entering the case and shortening the life of the motor.
Brushless motors are turning out some amazing speed !
After all is said and done, each option has its own advantages and disadvantage.
 I don't believe either option will  keep you from enjoying the fun that the R/C enthusiasts crave, you just need to choose the best application for you.
For more information on the available models and power-trains visit our website airarmorrc.com


Wednesday, June 7, 2017

NITRO T MAXX

                                                    NITRO T MAXX REVIEWED

Traxxas Innovation

At Traxxas they always seem to deliver, above and beyond the mark. Traxxas seems to have done it again with a combination of power and speed, superior handling, with a eye catching look and appeal with the all new Prographix bodies.
When the Traxxas Nitro T Maxx hit the stage, the R/C industry was blind-sided and no one saw it coming. The T-Maxx has become the #1 selling monster truck on the market today.
Delivering the speed and power is the TRX 2.5 Racing Engine.
Traxxas known for its innovative designs and outstanding performance, all backed by their industry leading customer service and support.

KEY FEATURES

Transmission 2 Speed Forward and Reverse 
nitro t maxx
Nitro T Maxx R/C Truck 


The totally enclosed transmission features 2 forward speeds, and 2 speeds in reverse. First gear delivers quick acceleration, while second gear provides speeds beyond 40 mph. With a simple push of a button on the TQ-3 transmitter and you are in reverse.

T Maxx Power

Several advanced designs on the TRX 2.5 racing engine combine for huge output, and amazing horsepower, capable of pulling off wheelies on command with the Nitro T Maxx, while exceeding speeds beyond the 40 mph mark. The engine design also features a free-flowing rear exhaust system.
The TRX 2.5 Racing Engine was manufactured and designed solely by Traxxas.
Outfitted with a composite slide carburetor with unique innovative porting, usually found on modified engines. Bringing the motor to life is made easy with the push button EZ Start 2 system.

Adjustable Independent Suspension

The Traxxas T Maxx rides on a wide 4 wheel independent suspension with over 3-1/2 inches of  travel and dual oil filled shocks on all 4 corners. The chassis consists of strong fiber composite materials making it extremely durable. For tuning purposes 10 shock mounting positions are available, with adjustable toe, caster, and camber.
The suspension on the Traxxas Nitro T Maxx provides quicker entrance and exit speeds in corners and rough sections of the track.
Its wider stance provides more stability and helps keeps the model planted while turning and cornering the model.


Prographix Body

The body on the Nitro T Maxx touts a new look with the prographix design with four different color options available, black blue, red, and white. The new design and graphics provide an awesome look on this terrain ripping monster. The body and graphics are impervious to fuel and are highly durable, maintaining their stunning appeal over time.
Comments from Consumers
Great value, durable and reliable
Best gift I ever bought for my husband
Love this truck every time I drive it I have a blast
After being in the hobby for some time and driving many different makes and models this one has me stoked.
Overall very durable, nothing broken, tuning was inconsistent. I provided good power once tuned. Seems to like to run on the rich side.

ADVANTAGES

Speed - 40 + MPH with the TRX 2.5 Racing Engine
Durability - Thicker 3 mm chassis. 50% more rigid than the original. Strengthened Turnbuckles with larger 3.5 mm turnbuckles.
Larger heavy duty driveshafts
Fully Adjustable Suspension - Wide array of shock mounting positions. Caster is also adjustable on front suspension.
EZ-Start 2 - Starting system with new roller clutch design for positive clutch engagements.

DISADVANTAGES

Engine Break in - Takes some time.  Run through approximately 5 tanks of fuel during break in.
Note: Improper break-in can cause future engine problems and shorten engine life.

OVERALL

Simply put, the Nitro T Maxx by Traxxas over the years since its introduction in 1999 has become the #1 selling monster truck in the industry.  The popularity and performance of the T Maxx has led to many
awards, Truck of the year, and best nitro truck 4 years in a row.  When your out and about and see how
many are showing up at your favorite bashing grounds you'll see why the truck simply speaks for itself.
For more information on this model visit our website airarmorrc.com


For more information and detail about the Nitro T Maxx 2.5 visit our website Air Armor RC airarmorrc.com

Monday, May 15, 2017

TRAXXAS XO-1

                                     An Informative Look at the Traxxas XO-1
                                                     

Traxxas  
        
At Traxxas the ability to lead is part of their mission, with innovative engineering and design their lineup of RC vehicles have become some of the best performers in the RC industry.  At Traxxas Power and Speed are pursued with the utmost passion.  They like to refer their brand as the fastest name in Radio Control, with the release of the Traxxas XO-1 back in 2012 delivering blazing speeds beyond the 100 MPH  mark they are seriously living up to that standard. They believe with quality and precision implemented into the equation you can produce a product that RC enthusiasts crave, and can't wait to experience the thrilling excitement, and fun they were designed to provide.
Their products are backed by a first class support team that are always available to answer your questions and address your needs.

traxxas xo-1
Traxxas XO-1
EXCITING FEATURES  

Power By Castle
To deliver 100+ MPH out of the box, Traxxas teamed up with Castle Creations to produce the power system to meet the expectations and punch required for the Traxxas XO-1. When used with 6S LiPo batteries the enhanced system can deliver higher output. A state of the art electronic speed controller the Castle Mamba Monster Extreme delivers the power to the custom brushless motor, for extremely high performance and quick acceleration. Only downside to the ESC, it is not waterproof, which has caused concerns for some. Many drivers have commented that the power and speed that the Big Block brushless motor can unleash is incredible.
Extreme Power for Experienced Drivers
This is definitely not a toy and not recommended for children or individuals under the age of 16 yrs of age. It is advised that persons under the age of 16 have responsible adult supervision during maintenance and operation. So you may be thinking what is required ?  It is recommended that you have had experience with high powered radio controlled models, due to the high speeds and acceleration of these models requires Traxxas to recommend the highest skill level of 10, which is intended for expert drivers only. Serious injury and even death can result if handled inappropriately. Safe Operation of the model is the operators responsibility.

Drivetrain
To achieve the 100 MPH speeds out of the box, on the Traxxas XO-1, a large 32 tooth pinion gear is included with the model. The shaft driven all wheel drive power train is extremely durable with an aluminum center driveshaft that directly engages both gear boxes at the front and rear of the model. Steel gear differentials with support bars that are reinforced are utilized to handle the horsepower.
The core of the suspension is designed for rigidity being aluminum, along with other aluminum parts, motor mount, shock towers, and wheel hubs.
The stock suspension system with a large amount of aluminum throughout is extremely durable, and capable of  handling every day abuse.
One driver was amazed and a bit concerned with at the amount of chat, sand and gravel the car picks up off the road or gravel surfaces.  He was concerned about chat and gravel damaging the spur or pinion gear after he removed the body and found several pieces lodged in and around the motor and drive components. He himself plans to stay away from surfaces that contain a lot of debris. Something to think about and be aware of.

                              
Radio System - Advanced
The TQi features a Ready to Race advanced system capable of connecting wirelessly to the latest link app from Traxxas for user friendly control. To access telemetry features the TQi can be outfitted with the Traxxas Link wireless module, capable of instant bluetooth connectivity, providing the driver with real-time telemetry and adjustable tuning features.
With the Traxxas Link App you can tune and improve the models performance by adjusting steering, throttle, and braking sensitivity. With telemetry sensors installed on board you can receive real-time data like motor temp, RPM, Battery Voltage, and MPH. You can also have the data recorded for review later and compare data at different intervals of the driving time.
The TQi system is compatible with (some-not all) other Traxxas models if you want to program other models into the same transmitter rather than having a radio system for each model.
Traxxas Stability Management 
With the innovative TSM system, capable of managing the power, handling, and performance of the Traxxas XO-1 and is fully customizable by the driver, by way of the included TQi transmitter.
How does TSM work and assist drivers ?
TSM makes the model easier to control and handle on slick, slippery surfaces, like smooth concrete, ice, or dusty surfaces. TSM senses the direction of the model and makes adjustments to steering to keep the model in line during acceleration, to prevent fishtailing, spinning out, or loss of control. While cornering TSM adjusts and corrects the model to continue on its heading, allowing the driver to accelerate earlier in a corner, increasing corner exit speed. TSM also assists with braking, holding your model straight until it comes to a complete stop .

ADVANTAGES


Traxxas XO-1 White
Power and Speed - Fast !  0-50 MPH out of the box.
Handling and Stability- With Traxxas Stability Management on-board,  handling characteristics are pleasantly enhanced.
Advanced Features- A number of features are included on the Traxxas XO-1 to aid and assist drivers with valuable real time data and performance enhancement for a thrilling driving experience.
Aerodynamic Stylish Design - To reach speeds beyond 100 MPH key components were integrated into to the model to achieve the goal. The rear wing is functional combined with the front splitter to control airflow, increase down force, and reduce drag.
Great Customer Support and Accessories-Traxxas Representatives are always ready to assist and address any of your problems or concerns.  I have personally received satisfactory support from the Traxxas Team.

DISADVANTAGES

Not a beginner Model - There is a reason for this ! Keep in mind that you or others around you can be seriously injured if the model is used improperly or in an unsafe manner. Recommended for Experienced Drivers. As always Safety is the operators responsibility.
Gravel and Sandy Surfaces-Some concern about damage to drive-train components when running the XO-1 on surfaces were chat, gravel, or sand are present.  Many are amazed at the amount of debris collected on and around the chassis.


OVERALL
Industry reviews rate the Traxxas XO-1 as one of the premier models on the market today.  Since its introduction, the price for the XO-1 has come down dramatically. It is definitely a heart stopper when it comes to blistering 100 mph speeds for those brave enough to bring it up to its full potential.  For more specifics and details visit our website Air Armor RC airarmorrc.com